Showing posts with label Ten Years War. Show all posts

Wednesday, 28 December 2016

Gun Running to Cuba! (Part two)

 
Having finally completed building my model ship, Anna, for gun running scenarios in the Cuban Ten Years War I needed to find a crew for her. I was unable to find any suitable naval type figures in 28mm scale and eventually settled on these four characters:


They are from Steam and Steel's Steampunk range and are described as Pinkerton Detectives. Steam and Steel do not seem to have a website but they do have a page on Facebook; I obtained the figures through Ebay which the company seems to use quite a lot for their marketing.


Whilst they are not particularly nautical the figures painted up really well and really look the part of the shady characters who would have been engaged in smuggling and gun running for the Cuban rebels.
 
I also needed a cargo for the ship and built some munitions cases from scrap wood left over from modelling the ship: 


To these I added some barrels, packing crates and bales from a variety of different manufacturers but all sourced via Ebay:


When I put the ship, crew and cargo together the effect was exactly what I had in mind when I first thought of adding smuggling operations to my Ten Years War game. Here are a few pictures of the finished models:


Cargo strewn on the beach and guarded by none too trustworthy characters waiting for their meeting with the insurgents.


Overall I am pleased with the result. All that is needed now is for these shady looking cutthroats to hand over their contraband to the very needy Cuban rebels!

Monday, 26 December 2016

Gun Running to Cuba!

For my Ten Years War in Cuba project I needed a ship of some sort to smuggle guns and ammunition into the country for the rebels. The rebels suffered a chronic shortage of munitions throughout the war from 1868 to 1878 and most of the major shipments that they were able to organise from the U.S.A. were intercepted. However they did manage to smuggle smaller consignments of weapons into the island from neighbouring countries and I decided to build a smaller ship that might have been involved in these operations. I eventually settled upon a Chesapeake Bay Flattie which I spotted in the sales at   Hobbycraft.


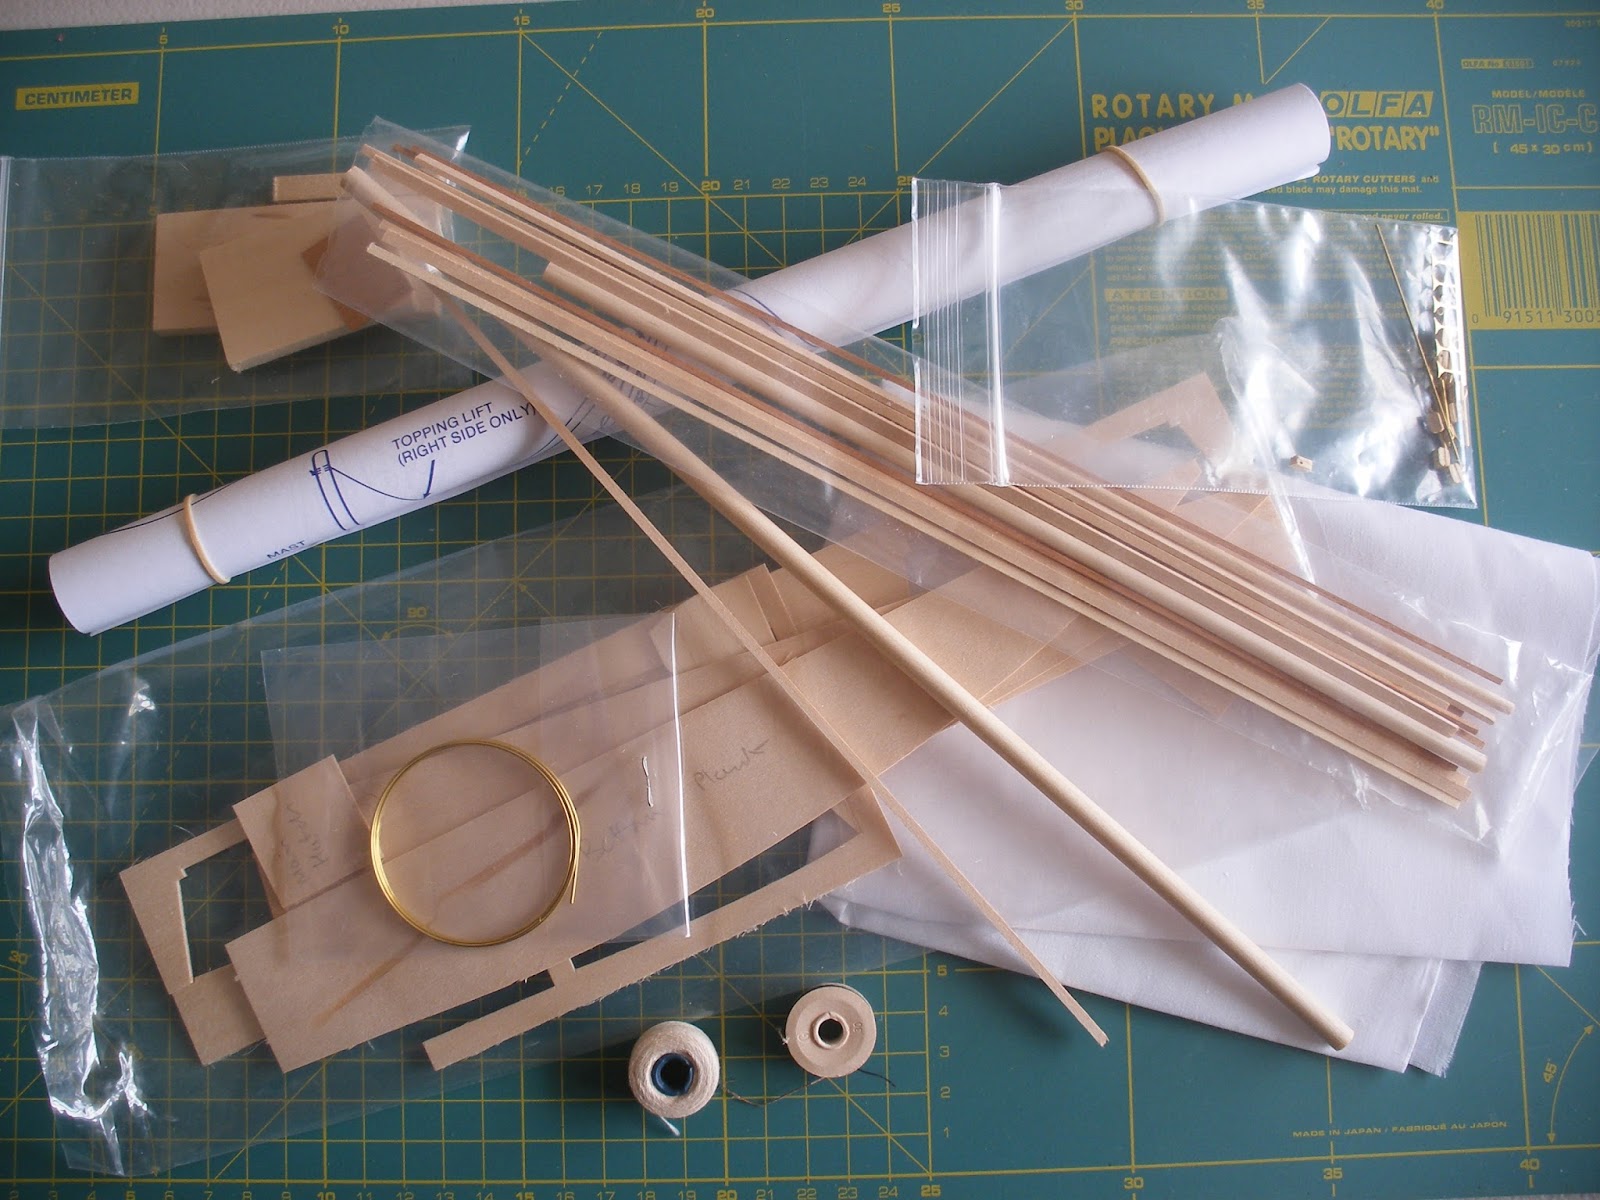
Opening the box was a surprise for someone more familiar with building 20mm plastic kits and 28mm figures since I was presented with two sheets of plans, a pile of wood, bits of metal and thread!


Once I got over the initial surprise I read the 42  page construction manual, which contained 164 separate steps, and started! The hull took shape fairly quickly:


Once I had sanded everything down and checked that all of the joints were sound, particularly where the timber had been curved and moulded into shape, I added some of the more detailed parts. When that was done I began work on the mast, spar and gaff. (See how quickly I began to lapse into proper seafarers jargon!)


At this stage the manual recommended painting and varnishing. I opted for the simplest suggested paint scheme:


As you can see in the photographs I also added the ship's name, Anna, which I printed and then fixed in place. I wanted to add a port to the stern on the ship and after looking at a map of Florida I opted for Boca Raton, a very minor port in the keys. Again I typed and printed out the text, glued it in place and varnished it.
 
Next task was constructing the mast, adding blocks for the rigging, and then making and attaching the mainsail along with the gaff and spar:


Once that was done the mast and mainsail could be fixed in place along with the jib and further rigging which, although tricky to complete, was well worth the effort as you can see from the photographs of the finished model:


And here she is, the gun runner Anna setting sail for Cuba with a cargo of eagerly awaited munitions:


My next, and much less challenging, task is to make something to represent a suitable cargo and then crew her with suitable figures. 


Sunday, 18 September 2016

Cuban Plantation Owner's House

I needed a house which was a little grander than the others in my small Cuban settlement; I wanted something that would pass as the planation owner's residence. I made the basic structure from foamboard and went for the simplest house shape that you could imagine. The technique for making nice neat joints at the corners is described in my description of building a Spanish Colonial Church here on my blog.  I have also included strengthening braces at the corners as you can see here:


I fixed this basic structure onto a baseboard before adding the roof which is plastic card  slate from the Wills range of model railway accessories. The ridge tile is simply a length of bamboo skewer. I also used skewers to make the supporting columns for the veranda roof:


Another view to give you an idea of the completed work so far:


I spray painted the whole thing in white undercoat to blend together the different textures and colours of the various materials that I had used. I sprayed about three coats to get a nice even finish, once that was done I painted the roof and the veranda roof in a terracotta colour and I added strips of plastic on the gable ends and across the front and back of the building to add interest:


Windows and doors were made very simply by painting and drawing them onto heavy duty cartridge paper. This is a technique I use a lot and I often add layers or strips of cartridge paper to give depth to the different parts. They were then glued in place and window ledges were added later using painted matchsticks.


When I had been looking at Spanish colonial buildings, and particularly those in Cuba, I noticed that there was a great liking for ornate railings on balconies and verandas. To represent this feature I bought a foot or so of lace ribbon from a haberdashery shop; I soaked it in pva glue and hung it up to dry. Once the glue had set overnight I was left with a rigid sheet:


The sheet of lace was then easily cut to size, painted and then glued into place. The effect was exactly what I had been after!


Another view of the finished building clearly showing the "lace" railings round the veranda and the window ledges that I had already added:


A final front view of the plantation owner's house ready for him to move in and ready for the Cuban forces to assault and burn down!


Saturday, 17 September 2016

Spanish Army for the Ten Years War in Cuba

My Spanish Army is made entirely of figures from the Perry Miniatures range, specifically their American Civil War boxed sets. The figures can be used straight from the box as they require no conversion work, the paint job giving them the required look.


The basic uniform of Spanish  colonial troops was made from a fabric known  as Rayadillo; this was white with fine blue stripes, roughly ten stripes per inch and therefore challenging  to paint!  I have seen figures painted in pale blues to represent the fabric but I opted to paint  a base coat of white and covered it with a very pale blue wash. I was reasonably happy with the results and went on to complete  the rest  of the uniform.  Collars and cuffs were green for infantry and red for all other units. Belts, boots, packs and so on were black or brown. Hats were mainly straw and were painted as such with the Spanish roundel  (red, yellow, red) on the right hand side.


American Civil War cavalry were used to produce lancers; apart from the paint work they just needed pennants adding:


Artillery were again taken straight from the box of Perry American Civil War artillery and given the appropriate paint job:
 
 
 I decided that some form of transport was needed and opted to build a cart pulled by oxen since this seemed to haver been particularly favoured at the time. The oxen came from a range of farmyard animals whilst the cart was based on a Perry artillery limber with the sides built up using coffee stirrers!


Wednesday, 17 August 2016

Completed Cuban Army for my Ten Years War in Cuba Project


General view of the three units that make up my early war Cuban Army. Units of liberated slaves are on either flank with Cespedes -leader of the rebellion - and a small group of plantation owners armed with miscellaneous weapons in the centre.

 
Above are two more views of the same early war units with the original Cuban flag. I believe that the genuine article from 1868 is now in the Museum of Havana.
 

Shown here are later war units of infantry and a mountain gun which can be added to the other units to strengthen them. Below are two more views which also show the final version of the Cuban flag and the one in use today:


Cuban cavalry deployed in line and preparing for their famous machete charge.
 
 
Two general views of my Cuban cavalry units:
 
 
The current state of my completed Cuban Army is:
3 Regiments of infantry for the early years of the war (9 plantation owners, two units each of 10 liberated slaves)
1 Regiment of 17 troops for the later years of the war
2 Regiments each of 6 cavalry
1 Mountain gun and crew.
 
I plan to add another regiment of six cavalry and the Cubans will also be able to call upon the gunrunning ship Anna and her crew when the models are finished!